Facebook Remarketing Explained – 4 Steps to Increase Your ROI
April 18th, 2016 by
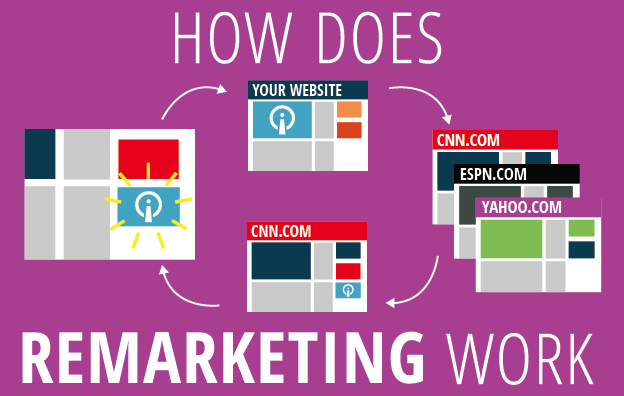
Have you ever window shopped for a new pair of running sneakers online and noticed they followed you around the Internet? Advertisements for those sneakers in the same color and size appear on almost every website you browse! You might even be scrolling through your Facebook News Feed and the sneakers pop up again. You may be thinking, “This is fate!” But no, this is not fate or the magic of the Internet.
I’m going to let you in on a little secret called remarketing. One of the hottest trends in remarketing right now is using Facebook to target a select group of ideal customers with tailored ads. Your company’s marketing team can use this powerful marketing tool to nurture relationships with qualified customers and increase sales.
What Is Remarketing?
Let’s say someone clicks on your brand’s Facebook ad. They’re instantly brought to your website, and they can browse your offerings. These people are generally qualified leads because they took the time to navigate away from their cluttered News Feed and click on your ad. However, they may not always complete an action like making a purchase, downloading an e-book, or providing their contact info. In fact, people rarely make a purchase the first time they visit a brand’s website or see an offer from the brand. These lost prospects are valuable, and you will want to continue your business experience with them.
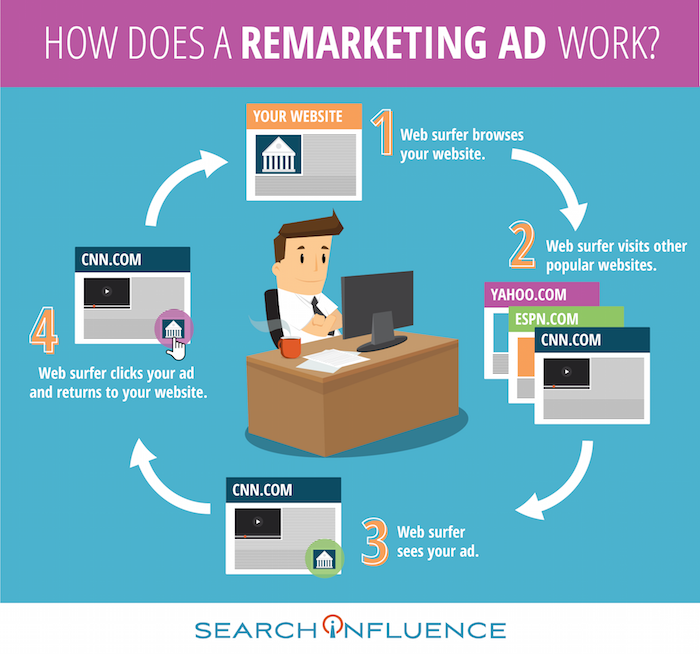
The overarching goal of remarketing is to place your brand at the top of consumers’ minds. Remarketing allows you to reach people who have previously visited your website and may not have made a purchase.
A great way to revive your relationship with them is by showing tailored ads to them again on Facebook. To do this, you can use your brand’s Facebook pixel to create a Custom Audiences for Website Traffic that builds an audience based on your brand’s website traffic. The opportunities to nurture and build relationships with current and prospective customers on Facebook are endless.
Why Should I Remarket on Facebook?
Facebook remarketing ads get three to four times the response rate of regular Facebook ads. With over 1 billion people using the social media platform daily, making sure that you’re reaching the right people is critical! The Custom Audiences for Website Traffic feature seamlessly reaches your ideal customers by creating a Facebook audience representing a group of prospective customers and current customers who have visited your website. This feature has a few benefits:
- Reach people who are genuinely interested in your brand through targeted Facebook Ads
- Bring people back to your website to complete an action
- Find new people who have similar characteristics to your website
By targeting your ideal customers, you will grow your brand’s fan base, drive website traffic, build a rock-solid email list, and increase ROI. You will also avoid burning a hole in your advertising budget by lowering cost-per-click, driving higher conversions, capitalizing on social proof, and expanding market reach.
How Do I Use Facebook Custom Audiences for Remarketing?
Now that you’re an expert in remarketing, let’s dive in and set up a Facebook remarketing campaign for your brand. I’ve created a 4-step guide that outlines the setup process.
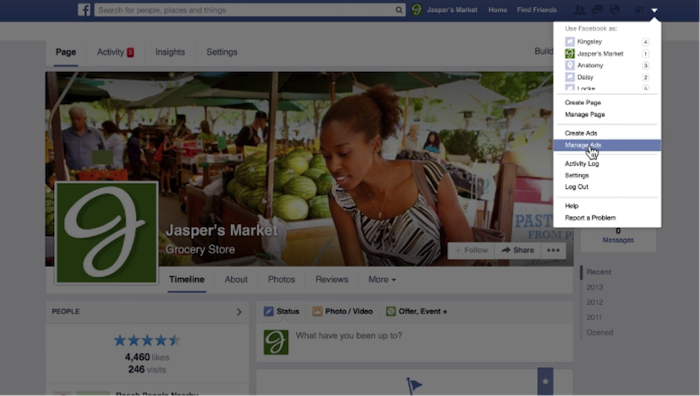
1. Access Facebook Ads Manager. Log in to your Facebook account and navigate to the drop-down menu on the top left of your screen. Select “Manage Ads” from the drop-down menu.
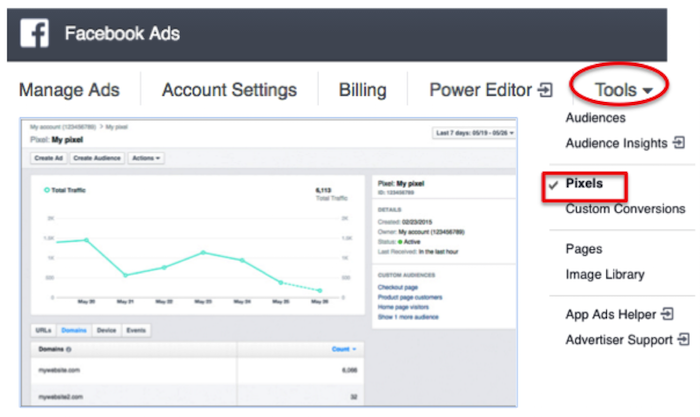
2. Create a Facebook pixel. To pinpoint your website visitors so you can retarget them on Facebook, create a Facebook pixel and insert it on your site. Now that you are in Facebook Ads Manager, click on the “Tools” drop-down menu and select “Pixels.” Click “Create a Pixel” and give it a name. Then, copy and paste the pixel code into your website code.
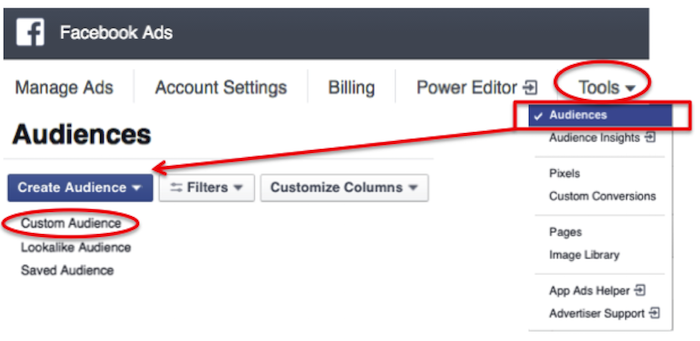
3. Build a custom audience. Click on the “Tools” drop-down menu and select “Audiences.” You’ll see a blue button that says “Create Audience.” Click on that button and hit “Custom Audience” from the drop-down menu.
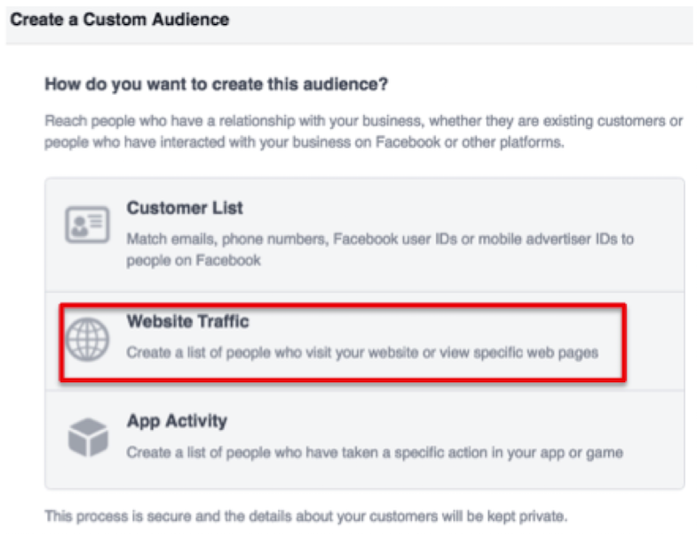
Then, select “Website Traffic” and name your audience.
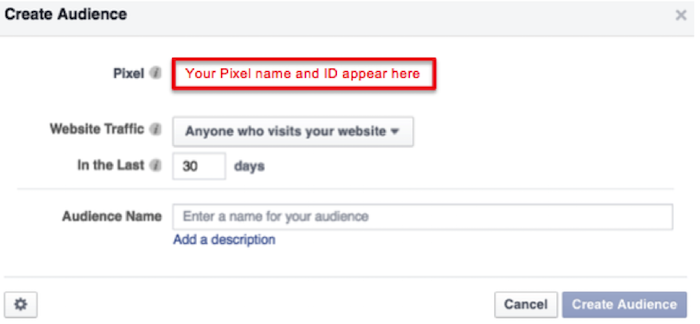
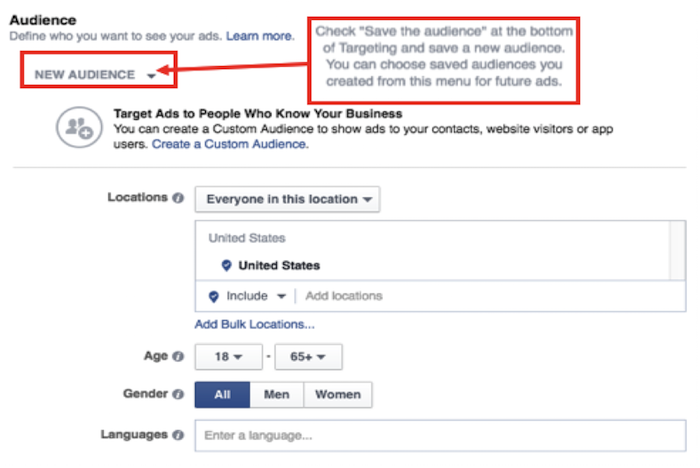
4. Craft an Ad. In the ads create tool, you can access your custom audience when you choose who you want your ad to reach.
Voila! You’ve successfully created your remarketing campaign. If you have any more questions along your remarketing journey, you can reference Facebook’s simple remarketing guide.
Image Credits:
“Manage Ads” Menu Screenshot – from Video
Pixel Graph Screenshot

Great post! I enjoyed learning more about remarketing.
Do you need a different pixel for each page, or just one Facebook pixel on the footer as an example?
Hi Steve,
The Facebook pixel consists of two components: the base code and the standard code. The base code should be placed on each page of your website. The standard code, however, is customized for specific actions that a customer can make on your website like “Add to Cart” or “Complete Registration.” This standard code should be placed on pages where customers can complete these actions. The base code is called before the standard code is called. Please let me know if you have any further questions!
-Nicole